Default in AutoCAD has two layouts that are layout1, layout2. If you do not see the default layout tabs, you will turn on them. Open the OPTIONS dialog box (type OP > Space). Click the Display tab and then check the box next to Display Layout and Model tabs then click OK.
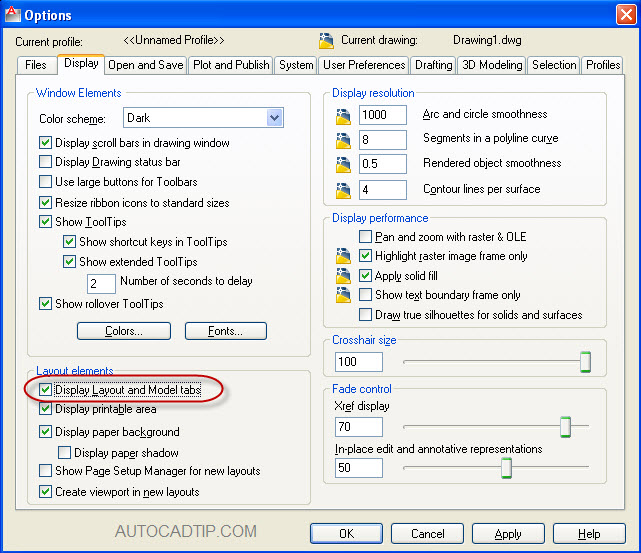
Turn on layout tab
In this series, I will help you how to create a new layout in AutoCAD software? Here are three ways to add a new layout.
Using new layout feature.
If you are in model space, you select Insert on toolbar > layout > new layout > entern new layout > enter.
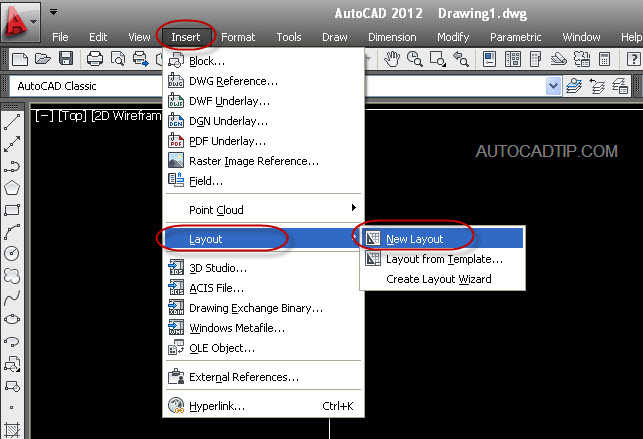
Run new layout feature
If you are layout space, you can do an above tutorial or type LAYOUT command > Space > show eight options and then you choose New > enter new layout’s name > press enter.
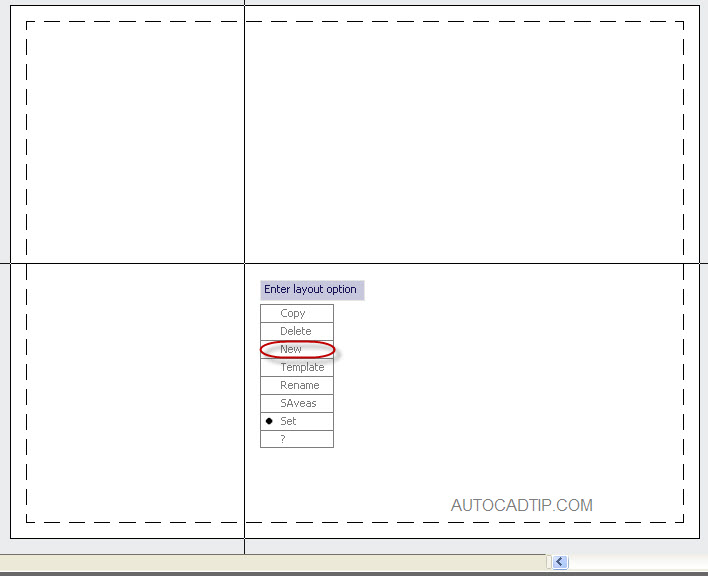
Type LAYOUT
Other way, you click right of mouse on already layout > select New layout > AutoCAD will create a new layout with default name layout3
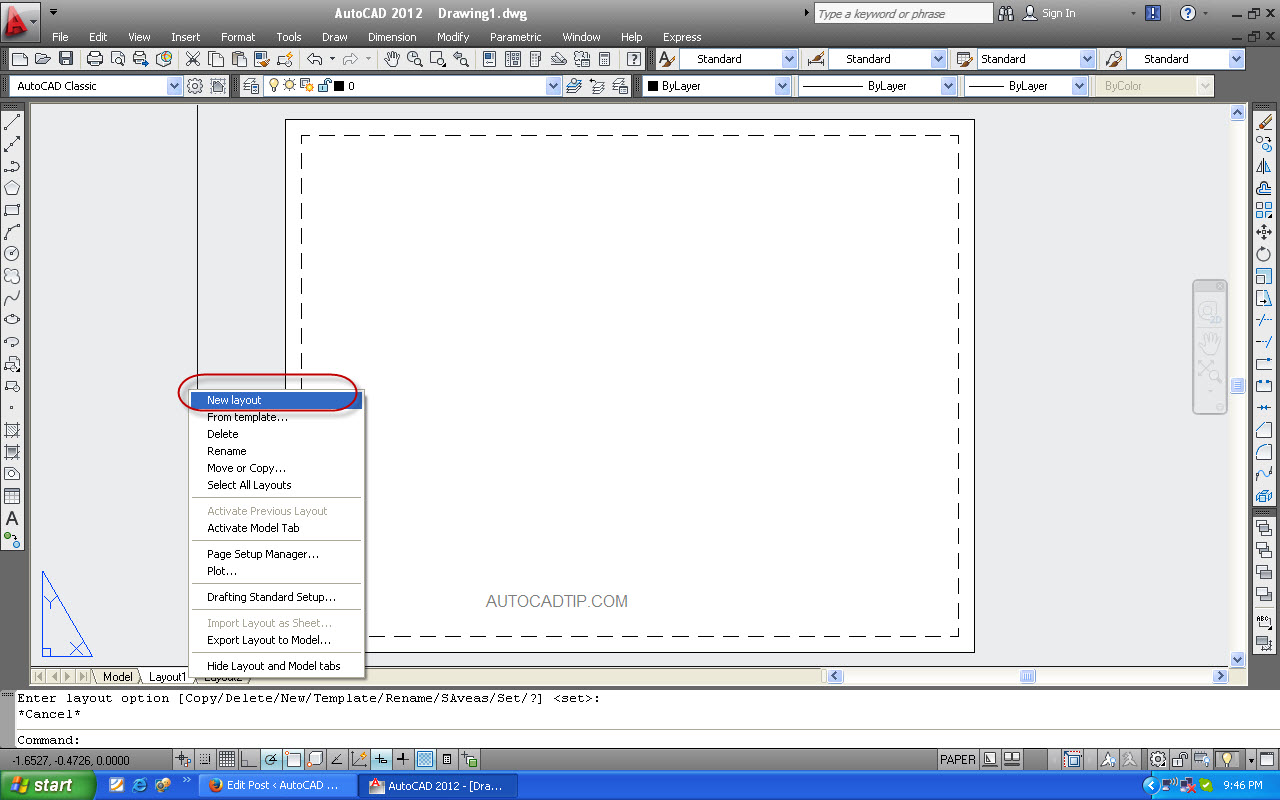
Click right of mouse on layout.
Using wizard feature.
This method can perform anything space. You select Insert > layout > create layout wizard.
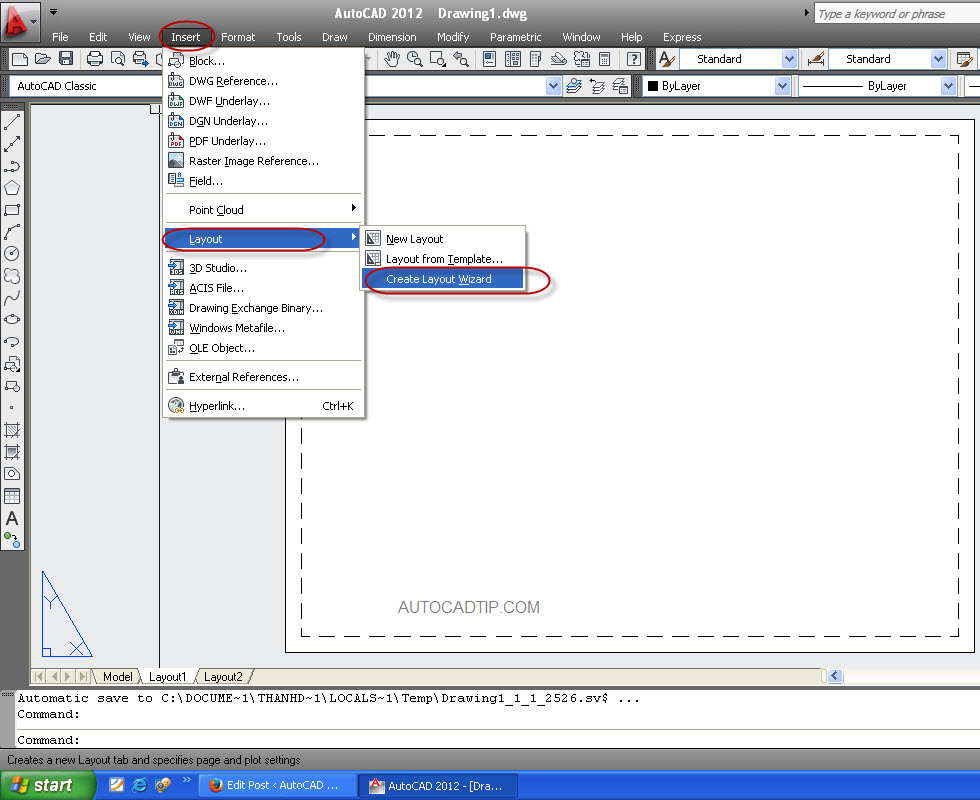
Create layout wizard
Or click Tool > wizard > create layout or type LAYOUTWIZARD > space. Now software will show create layout box. You should setup some parameter as figure follow.
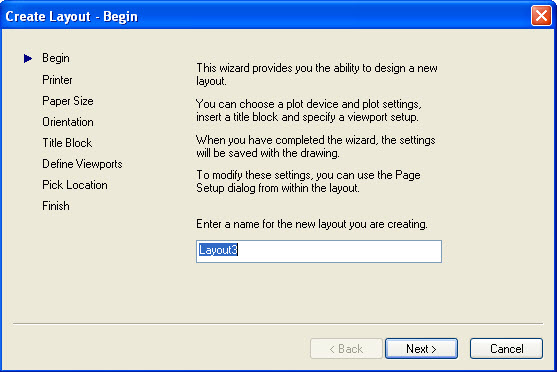
Create layout box
Step 1: You enter name your new layout tab. By default, AutoCAD will give you 2 generic layouts and given them generic names.
Step 2: You assign the printer/plotter that you plan on using when printing this layout. If you are not connected to that plotter or away from the office, use the “None” option. This way you have all of the sheet sizes available to you. Otherwise assign the plotters accordingly.
Step 3: You choose the paper size that you plan on plotting to. It is important that you choose the correct size because there are a lot to choose from. My advice that you should select A1 paper.
Step 4 : You will assign the orientation of the sheet. “Landscape” or “Portrait” is the options. My advice that you should choose the “Landscape” option if it isn’t already selected.
Step 5: You go to assign a title-block to your layout. If you have your own title-block and it is not shown in the list, select the “None” option and insert it as a block later on. I will choose the generic title-block provided by AutoCAD for this tutorial.
Step 6: where you can setup a viewport. You don’t do much setup in this portion. My advice that you should choose “None” option.
Step 7: Pick Location (Select Location) temporarily puts in your new layout so that you can pick 2 points (like a rectangle) that will be the new viewport. After the 2nd point is picked, it will put you back in the Wizard. If you don’t click the “Select Location” button, it will place it for you and you will need to adjust it later to work for you. if in the step 6, you choose “None” option, this step will pass over.
Using move or copy feature.
After you had created layout setup that it is enough factors as printer, paper size, orientation, etc. Now you can copy this layout to use by move or copy feature.
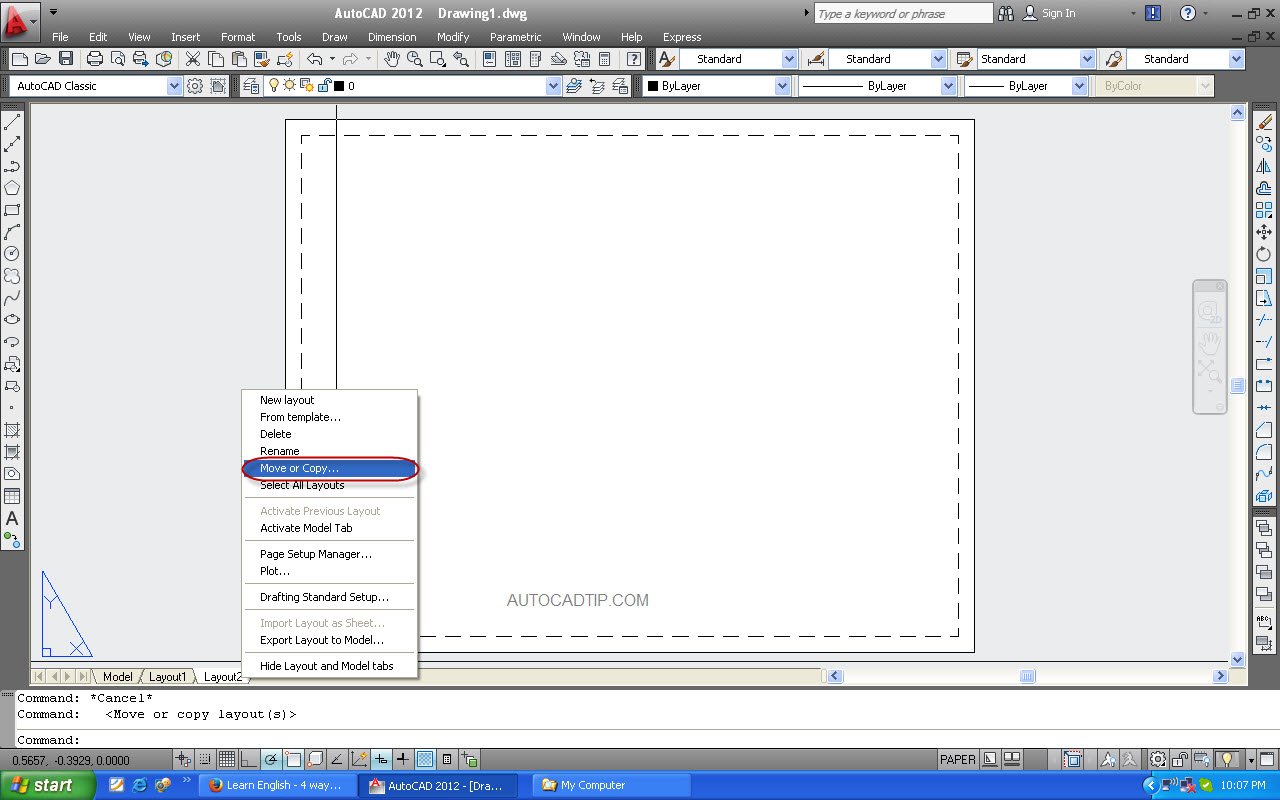
Move or copy feature
To copy a layout, make sure that the copy checkbox is checked. If you don’t do this, you will only move the layout. In this dialog box, you can select where you want the new layout tab to be placed.
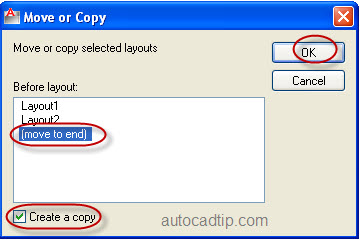
Move or copy box
Video tutorial: