Commonly, in the drawing there are a different lot of scale styles. Some scale is popular as 1:10, 1:20, 1: 25, 1: 50, and 1:100. If you are civil engineering, you will see this ratio in the design drawing or construction drawing. So, how to create and control a new dimension in AutoCAD? In the tutorial lesson, I will introduce how to create it.
The first, you should remember that it is dependent on how your drawing presents and how is space. You need to determine this. According with my experience, you should show drawing in the layout space and when you dimension for components, you work in the model space. I will guide an example particular with some requirements for this case with scale 1:50
Step 1: type D on command line > Enter and AutoCAD show dimension style manager.
Step 2: Select New > it will show create new dimension style box, now you setup some information as new name and other options as default > click on continuous and next show new dimension style dialog box.
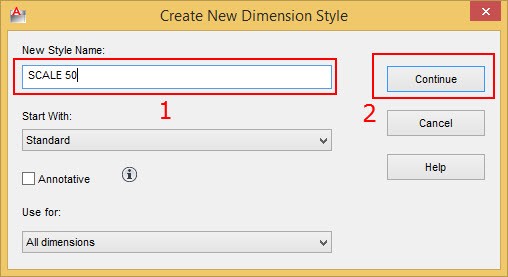
Create new dimension
Step 3: You are going to setting some option for this scale.
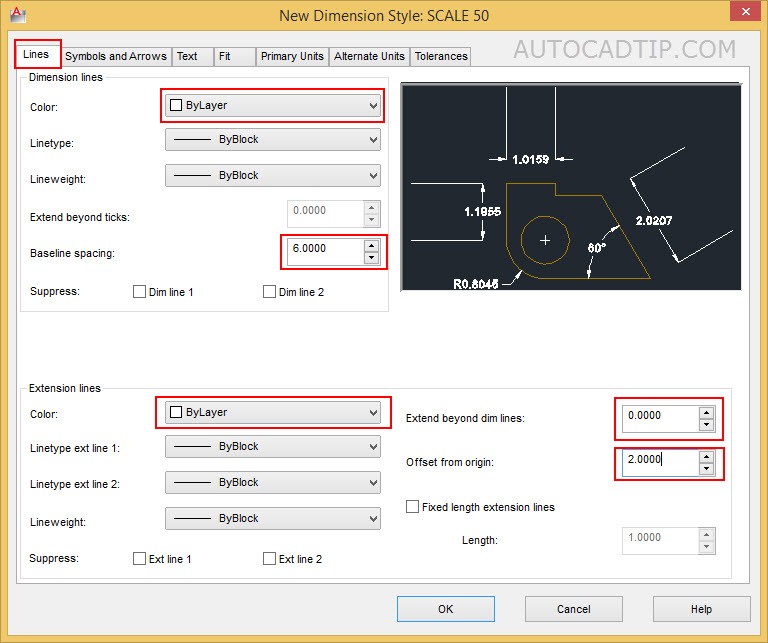
Setting Line option
Setting symbol and arrow option
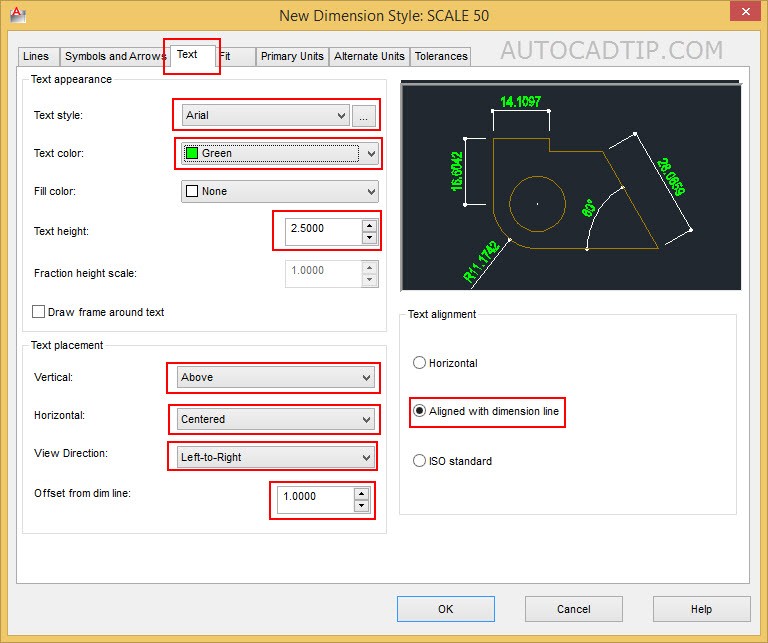
Setting text option
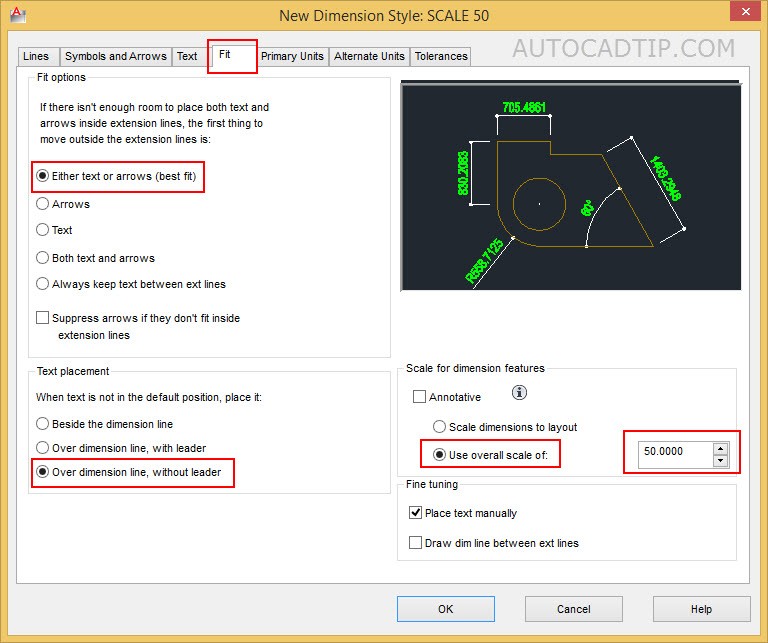
Setting Fit option
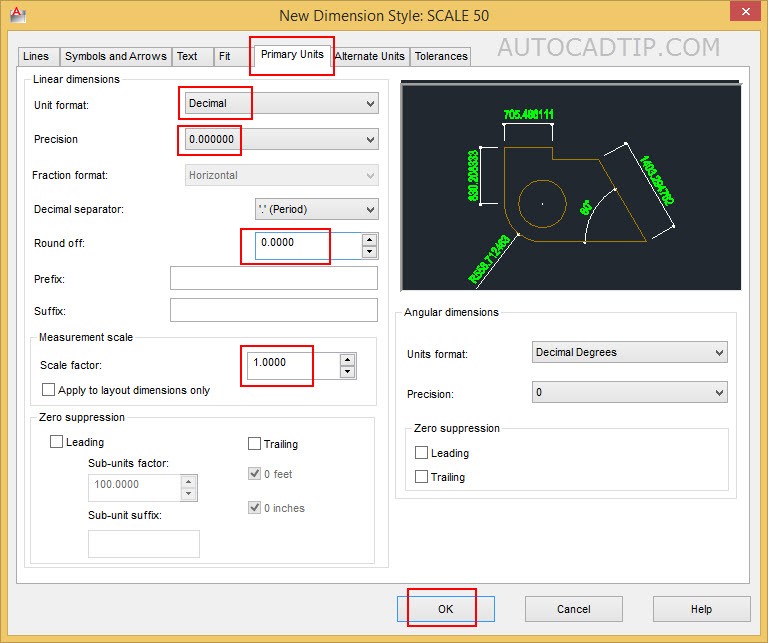
Setting primary units option
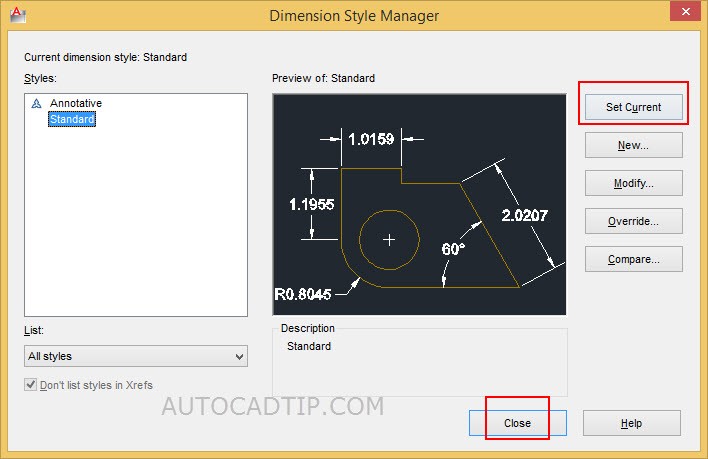
Set current and close
Video tutorial create a new dimension scale 1:50
Download template file had create some scale style a here